
Crafting the perfect cup of coffee at home is one of life’s greatest pleasures, and mastering milk steaming can elevate your coffee game significantly. I vividly remember my early struggles with the Breville Barista Express steam wand—attempt after attempt resulted in overly foamy bubbles or burnt milk that left me discouraged. But with patience, practice, and a bit of guidance, I eventually mastered the technique and now enjoy silky, café-quality microfoam every day. If you're facing similar challenges or just want to improve your milk steaming skills, this guide will walk you through every step of the process. Uncover the brewing precision of the Breville Dual Boiler BES920XL review
Getting to Know the Breville Barista Express Steam Wand
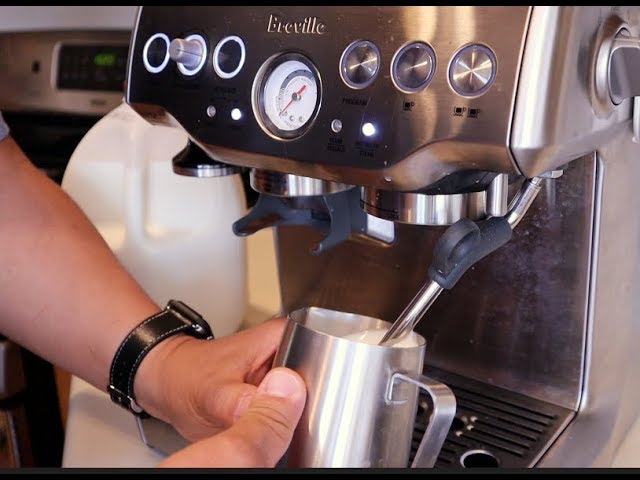
The Breville Barista Express is a highly regarded home espresso machine, known for producing rich espresso shots and high-quality milk foam. At the heart of this is the steam wand, which features a 360-degree swivel, making it easy to maneuver as you steam your milk. Learn how this model blends convenience with innovation in the Breville Barista Touch Impress review
Before you begin, ensure that your machine is fully heated. The indicator lights will let you know when it's ready. In my early days, I often rushed this step, leading to subpar results. Allowing your machine to fully warm up is essential for achieving that perfect microfoam. Compare these top models to find your perfect match in the Breville Barista Express Impress vs Pro review
Selecting the Right Milk
The type of milk you choose plays a significant role in your steaming success. Whole milk is a popular choice because of its higher fat content, which helps create thick, creamy foam. It also tends to produce a rich and velvety texture. If you're looking for a lighter option, skim milk can also work, though the foam may be airier. See what makes these machines stand out in the Breville Barista Pro vs Express review
For non-dairy drinkers, there are plenty of options as well. Almond, soy, and oat milk all perform differently due to their unique protein and fat compositions. In my experience, oat milk—particularly barista-grade varieties—produces the most consistent and creamy foam. Explore the key differences between these premium machines in the Breville Oracle vs Oracle Touch review
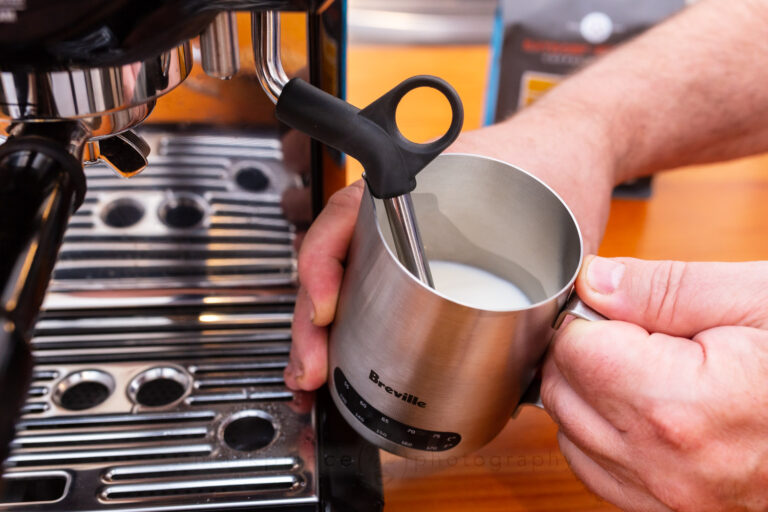
To get the best results, always use a stainless steel milk jug. Not only does it allow for better heat conduction, but it also helps you gauge the milk’s temperature by touch. Fill the jug with cold milk, approximately one-third full, just below the spout. Starting with cold milk gives you more time to work before it overheats.
Step-by-Step Guide to Steaming Milk on the Breville Barista Express
1. Purge the Steam Wand
Before you start steaming, always purge the steam wand. Turn the steam knob on briefly to clear out any residual condensation. This ensures that you’re working with dry steam, which is crucial for creating smooth, fine microfoam. Skipping this step can result in unwanted watery steam, ruining the texture.
2. Position the Steam Wand Correctly
Positioning the steam wand is key. Place the tip just below the milk's surface near the jug’s spout, and hold the jug at a slight angle. This helps incorporate air efficiently while setting up a whirlpool motion in the milk—vital for a consistent, creamy texture.
3. Stretch the Milk (Incorporate Air)
Turn the steam knob to full power and listen for the signature hissing sound. Keep the wand tip just beneath the surface for the first few seconds to introduce air—this is called “stretching” the milk. Be careful not to overdo it. Too much air will result in large bubbles rather than the silky microfoam you’re aiming for.
4. Texture the Milk
Once you've incorporated enough air (typically within 3-5 seconds), raise the jug slightly so that the steam wand is fully submerged. This is the texturing phase, where the goal is to heat the milk while maintaining the whirlpool motion. The whirlpool action helps break down any large bubbles and turns the milk into a shiny, velvety foam. The texture should resemble wet paint—smooth and glossy.
5. Monitor the Temperature
Temperature control is critical when steaming milk. To gauge the milk’s temperature, feel the outside of the jug with your hand. When it becomes too hot to touch comfortably (around 150°F or 65°C), it’s time to stop steaming. If you prefer precision, a thermometer is a great tool to avoid overheating the milk. Overheating can result in a burnt taste and ruin the milk's natural sweetness.
6. Turn Off the Steam
Once you've reached the ideal temperature, turn off the steam before removing the steam wand from the milk to avoid splattering. Set the jug aside carefully.
Final Touches for a Perfect Cup
Tap and Swirl the Milk
After steaming, gently tap the jug on the counter and give it a swirl. This helps remove any large bubbles that may remain, resulting in a smooth, glossy finish. In my early attempts, I skipped this step, but it makes all the difference in achieving consistent foam.
Clean the Steam Wand
Cleaning the steam wand immediately after use is essential. Wipe it down with a damp cloth and purge it once more to remove any leftover milk. Regular cleaning prevents milk residue buildup, which can clog the wand and reduce its performance.
Pour the Milk
When it’s time to pour, tilt your coffee cup slightly and start pouring from a higher point to combine the milk and espresso. As you get closer to finishing, lower the jug to create latte art if you’re feeling adventurous. A steady hand and well-textured milk are key to making beautiful latte art, so don’t be discouraged if your designs aren’t perfect at first.
Expert Tips and Tricks
Practice Consistently
Steaming milk takes time to perfect, so don’t get discouraged if it doesn’t come out right immediately. Keep practicing, and adjust your technique based on the type of milk you're using. Every mistake is a learning opportunity!
Use Fresh Milk
For the best results, always use fresh milk. Fresh milk produces the best foam because the proteins help create the structure needed for microfoam. Avoid milk that has been open for too long or is close to its expiration date.
Experiment with Different Milk Types
While whole milk is generally the best for steaming, plant-based milks can also work well. Barista-grade oat milk, in particular, is one of the best non-dairy alternatives for steaming.
Common Mistakes to Avoid
Over-Aerating the Milk
Too much air can lead to frothy, airy milk rather than the creamy texture you want. Aim for a soft, subtle hiss when you introduce air into the milk and avoid over-aerating.
Overheating the Milk
Milk burns at temperatures over 170°F (77°C), so always monitor the temperature closely. Overheated milk loses its sweetness and can taste scorched.
Skipping the Purge and Clean
Neglecting to purge and clean the steam wand can lead to performance issues and even clogging. It’s essential to clear the wand before and after every use to keep it in optimal condition.
Exploring Latte Art
Once you’ve mastered milk steaming, you can start experimenting with latte art. Begin with simple shapes like hearts and rosettas, and as your skills improve, try more intricate designs. Keep practicing, and don’t be discouraged by imperfections—latte art is a skill that improves with time.

Conclusion
Steaming milk on the Breville Barista Express has completely transformed my home coffee routine, allowing me to craft café-quality beverages whenever I please. With patience and practice, you too can achieve perfectly textured milk that makes every latte and cappuccino an indulgence. Understanding your equipment, refining your technique, and enjoying the learning process is key to your success.
Whether you’re just looking to enjoy a perfect morning latte or are on a quest to master latte art, the satisfaction of making your own beautiful cup of coffee is second to none. So, turn on your Breville, grab your milk jug, and get steaming—your perfect cup is waiting for you!
FAQ
Q: Why is my milk always full of big bubbles?
A: Large bubbles are often a result of over-aerating the milk or positioning the steam wand too close to the surface for too long. Try submerging the steam wand slightly more and incorporate air only in the first few seconds.
Q: What type of milk is best for steaming?
A: Whole milk is generally the best for steaming due to its higher fat content, which produces a rich and creamy foam. For non-dairy options, barista-style oat milk tends to work well.
Q: How do I know when the milk is at the right temperature?
A: The easiest way is by touch—when the jug becomes too hot to hold comfortably for more than a second, the milk is at the right temperature (about 150°F or 65°C). You can also use a thermometer for precision.
Q: Why is it important to purge the steam wand?
A: Purging the steam wand before and after use ensures that any condensation or milk residue is removed. This helps maintain the quality of your steam and prevents the wand from clogging over time.
Q: Can I use plant-based milk to create latte art?
A: Yes, but results vary depending on the type of plant-based milk. Barista versions of oat or almond milk are usually the easiest to work with and can create decent microfoam, making latte art possible.